Simple Vector Logo Design
In this tutorial we will explore the idea of creating custom (vector) logos in Photoshop. We will explore the idea of font manipulation as well as adding custom shapes to the mix. (*note: This tutorial assumes you know how to use the Pen tool enough not to make your way around comfortably inside paths.) |
| 1 |
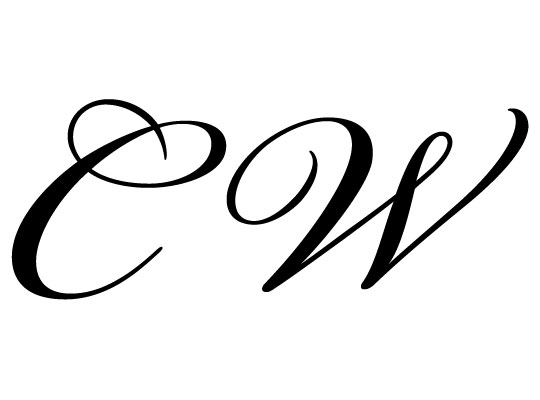
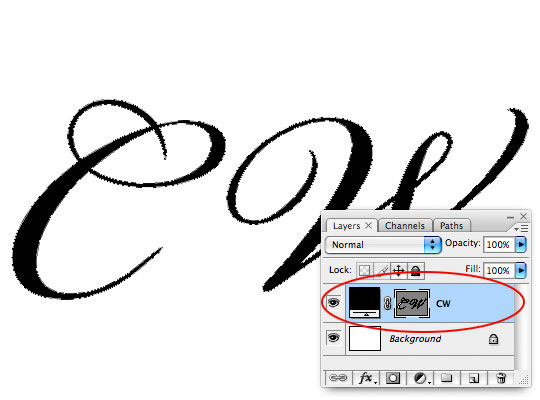
| My realtor recently asked me to give some thought to what she might do with her logo. Her initials are CW and one of her big requests was to use the initials in the logo. Typically I’m more of an abstract symbol kinda guy and I don’t typically favor the "use your name as your logo" philosophy (not that there’s anything wrong with it and sometimes it makes good sense, but because I’m a right brain guy who likes graphics more than words), so lets see if we can use this tutorial to use a little bit of both. I’m starting with a new canvas with a white background for clarity, but any color will do. Then I’m going to grab the Type tool by pressing the T key and with the foreground color set to black type the initials on the stage. I’m using the font Bickham Script Pro and I’ve sized the font nice and big so you can see what I’m doing and to make working easier. Since we plan to output a vector logo file size doesn’t make any difference here, but it’s always easier to work with big stuff for me. |
 |
| 2 |
| Using a pre built font as a starting point makes consistency and style a little easier, though you could create the whole thing with the Pen tool if you feel so inclined. Since I chose to use a font rather than to create the shapes by hand I need to convert the text into a medium that I can manipulate (ie. paths). So I’ll Command-Click (PC: Right-Click) on the text layer and choose Convert To Shape from the menu. You can see in my layers palette that the text layer has been converted to a Shape Layer. |
 |
| 3 |
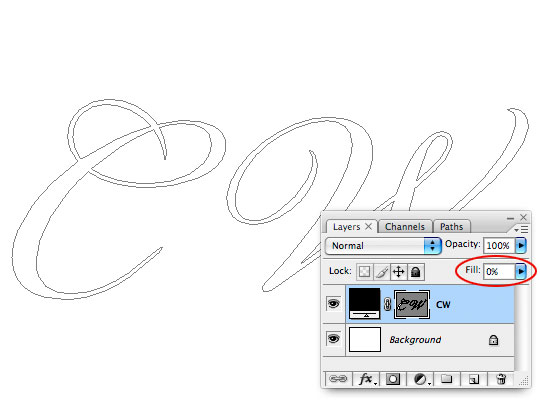
| To make things even simpler, lets go ahead and lower the Fill opacity for this layer to 0%. Now we can see that paths we’ve just created clearly. |
 |
| 4 |
| The next step is to get the two letters into a position where I can combine them and begin manipulating the shapes to my liking. Press the A key to bring up the Path Selection tool, click on a letter to select it, then move it into position. |
 |
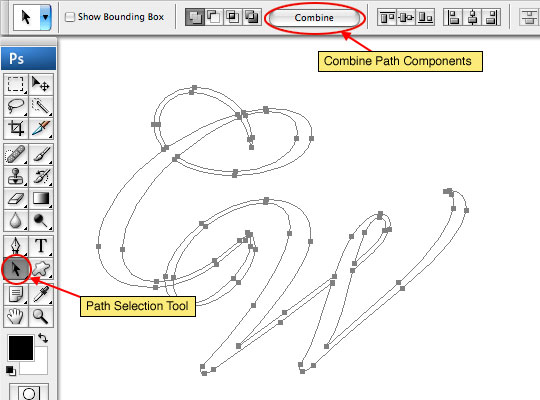
| 5 |
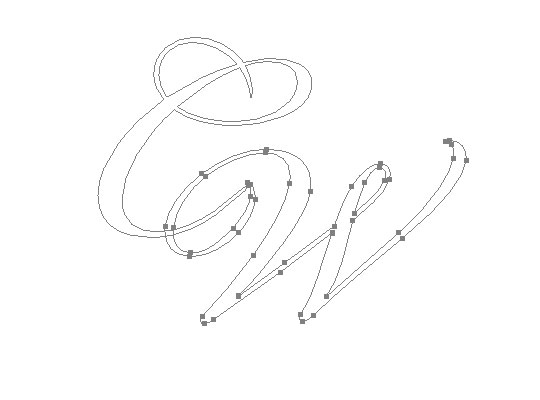
| Because the paths overlap and I want to be able to edit them as one unit I’m going to press the Combine button in the Path Selection tool options bar at the top of Photoshop. This will effectively merge the paths together and make them much simpler to work with as well as address any overlapping sections that might have previously been a problem. |
 |
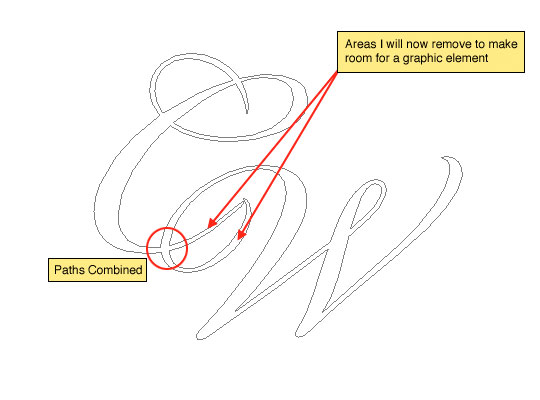
| 6 |
| Next I will identify the areas of the text that I want to change. In this case I will be removing the tail of the C letter and part of the beginning of the W to make room for a graphical element between the two. |
 |
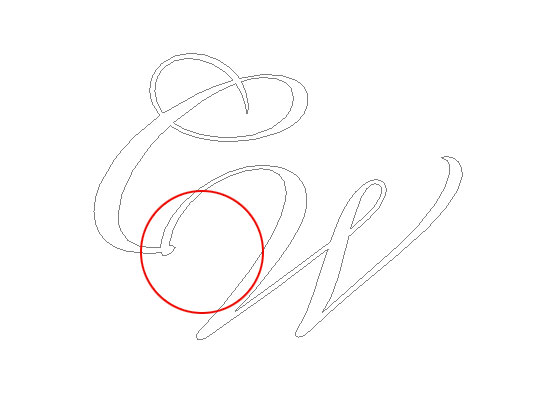
| 7 |
| Switch to the Direct Selection tool (which is found by clicking and holding your mouse over the Path Selection tool we were using earlier until the fly out menu appears. (*note: If you already have the Path Selection tool active, you can simply press Shift A to switch to the Direct Selection tool.) Now all I have to do is click on a segment of the path and press Delete (PC: Backspace) to remove it. You can see here that I’ve removed the two pieces described above and was sure to keep the path closed (the little bubble area where the two letters meet. |
 |
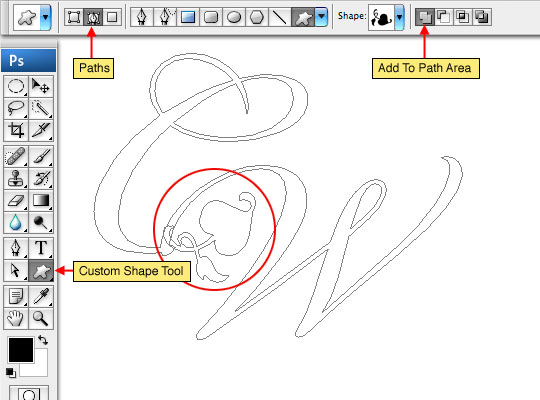
| 8 |
| Now lets introduce a custom shape to the logo. Press the U key to switch to the Custom Shape tool. In the Options bar at the top of Photoshop be sure that the tool is set to Paths and Add To Shape Area. I chose this nice little flourish shape which will fit nicely between the letters. Now simply drag a new shape onto the canvas, adding it to the current shape layer. You will notice that this path is separate from the previous ones and you can move and transform it with the Direct Select and Path Selection tools to get it right where you want it. |
 |
| 9 |
| Just like I did in Step 5 I’m going to switch back to the Direct Select tool and using the Combine button I’ll merge the new custom shape with the text from earlier effectively creating one big path from the two parts. Here’s where your skill with the Pen tool really comes into play. By moving and modifying the points and segments of the path I’m going to integrate the new custom shape into the flow of the lettering as shown below. |
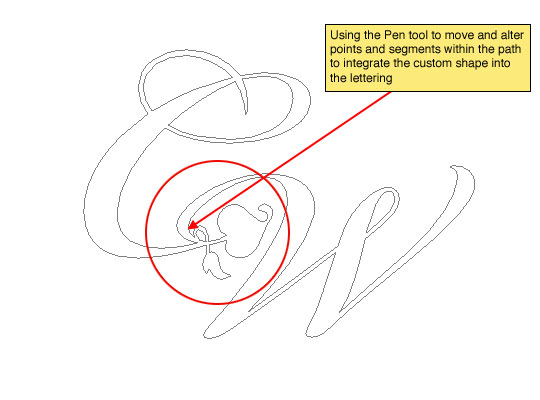 |
| 10 |
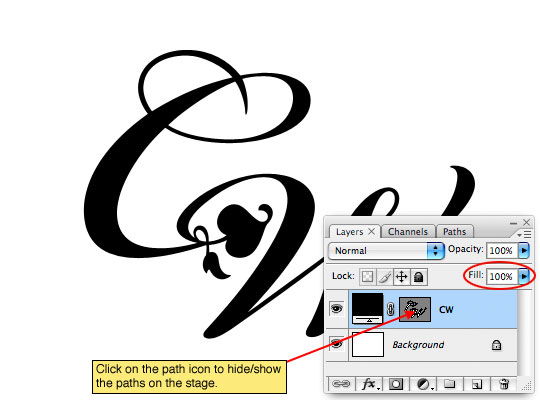
| At this point it makes sense to turn the Fill opacity of the layer back to 100% to view the outcome of all that manipulation. By clicking on the shape thumbnail (the one on the right) in the layers palette we can hide the paths so only the fill is shown. |
 |
| 11 |
| There are a few usage options I should point out here. First, if you switch to the Pen tool you can Command-Click (PC: Right-Click) on the path and save it as a custom shape which will make it available at the click of a mouse anytime in the future. Second, the paths can be moved to Illustrator and saved as a vector .AI or .EPS file by simply clicking and dragging from the Photoshop document into an open Illustrator file. And third, the file can be saved as it stands and used anytime in the future as a vector shape layer. I prefer to the first two options more than the third because shape layers (in my point of view) are less convenient to my workflow. Learn to convert shape layers to .AI and .EPS files in my Creating A True .EPS File Using Vector Masks tutorial. |
 |
| 12 |
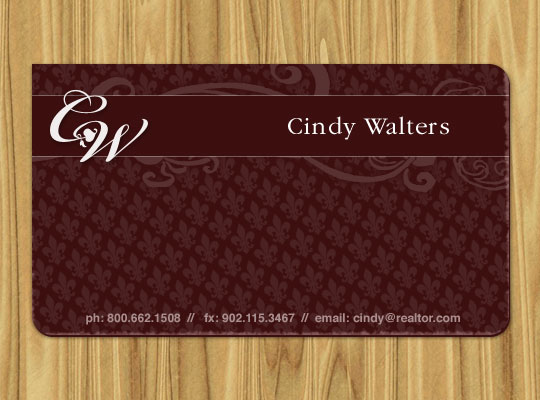
| Add it to a business card or a billboard. Our vector logo will shrink and expand perfectly now for any use! |
 |


