Creating A True .EPS File Using Vector Masks
In this Photoshop tutorial I will show you how to take an illustration created using Vector Masks in Photoshop, turn it into an Illustrator file with all the associated paths, layers and colors and from there turn it into a true .EPS file. Now I know I know what you’re thinking, you’re saying to yourself "Hero, this is a Photoshop tutorial website and now you’re talking about Illustrator!" Well, that’s all true and I apologize… but there are many times as a designer when more than one program comes into play, and this process is one of them. So cheer up little buddy, I promise not to do this kind of thing very often. |
| 1 |
| For those of you who’ve spent time on the site and seen the Vector Coffee Cup tutorial then you’ve seen the technique I’m using in the first part of this tutorial before. For those who haven’t, I’ll give a quick run down of how this file will be created before moving to the Illustrator steps. The first thing I did for this project was to find an image which I wanted to have in vector form. In this case I chose this gingerbread man because I liked the use of gradients and the complexity of the little guy. |
 |
| 2 |
| I outlined the body of the gingerbread man using the pen tool on a new layer. |
 |
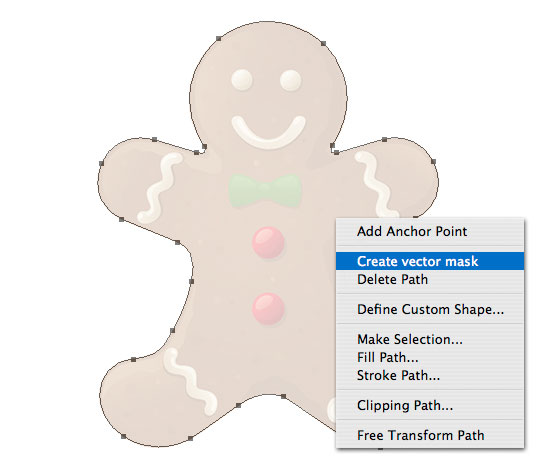
| 3 |
| With the path completed and the Pen Tool still active, I Control-Clicked (PC: Right-Click) on the path and choose Create Vector Mask. (*note: You could also choose Create Custom Shape to save this path to your custom shapes palette for later when you need an impromptu gingerbread man shape!) |
 |
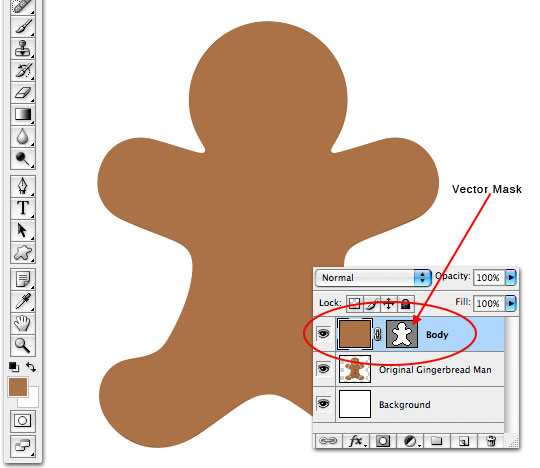
| 4 |
| Next, select the Foreground Color swatch from the Tools bar, sample the main color from the body of the gingerbread man and fill the layer with that color. |
 |
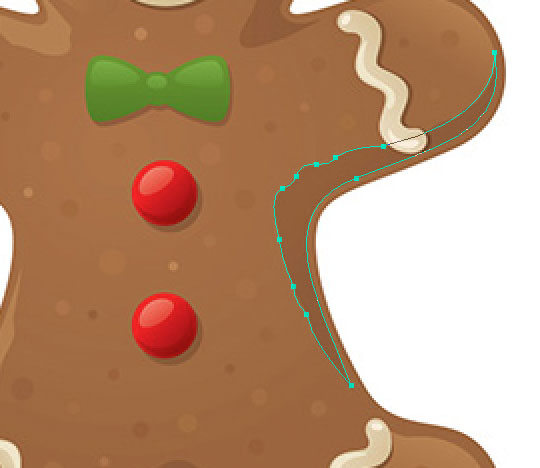
| 5 |
| Now I’ll turn the body layer off by clicking the Eye icon next to the layer in the layers mask to reveal my original gingerbread man once again and I’ll choose the next area to trace, in this case I chose the shadow on the right arm. It’s best to visualize the project like a painting with layers, and to start at the back and work your way forward. Trace the area with the Pen tool, Create Vector Mask, sample color and fill the layer. |
 |
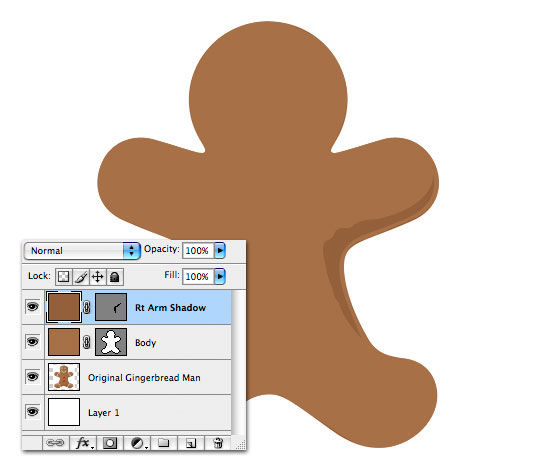
| 6 |
| If I turn the Body layer back on you can see the result of the second Vector Mask. |
 |
| 7 |
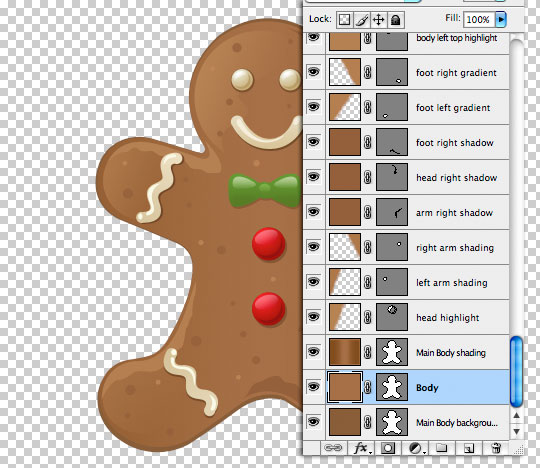
| Repeat this process for each and every part of the object… In this case I ended up with 57 unique layers each with it’s own Vector Mask and coloring. Keep in mind that all the usual opacity changes and gradients are available to you when working with Vector Masks in Photoshop. Here is the final result of all that hard work… looking a whole lot like the original indeed! |
 |
| 8 |
| The next step is to prepare the file to save and open in Adobe Illustrator. The first thing to do here is to remove any layers that we don’t want to be in our Illustrator file including the background color and the original gingerbread man graphic leaving just the big stack of layers and their associated Vector Masks. Save the file as a Photoshop file (.PSD) to the desktop (or somewhere you won’t forget) and open a new file in Adobe Illustrator. |
 |
| 9 |
| In Illustrator choose File>Open and navigate to the file you just saved. The Photoshop Import Options dialog box will appear asking how you’d like to deal with this file. We obviously don’t want to flatten the file so choose Convert Photoshop Layers to Objects and leave the other options blank as shown below. |
 |
| 10 |
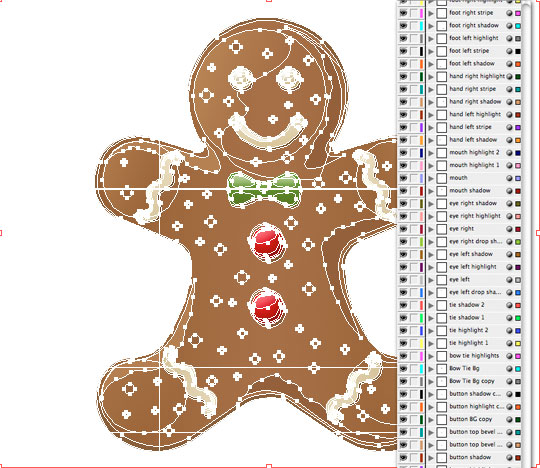
| Now you should see that all your layer from Photoshop have indeed been imported individually and if you press Command-A (PC: Ctrl-A) to Select All, you will see that all your paths now exist in Illustrator just like you laid them out in Photoshop. |
 |
| 11 |
| At this point you can either save the file as an Adobe Illustrator file (.AI) or you can choose File>Save As… and choose the Illustrator EPS (.EPS) file format from the drop down in the Save As dialog box to produce a true .eps file. In the Project Download at the end of the lesson I’ve included my original Photoshop (.psd) file AND the Illustrator (.ai) file for your learning enjoyment. |
 |


